Wednesday, May 16, 2012

The Fence Goes Up


This was done in the month of March..
Time to install our new fence from the front of the house to connect with the ugly
preexisting chain link fence.

Now we could not be normal and install pre-made wooden Fence Panels, instead it is going to be built from scratch.
George first digs the holes for the fence posts and then gets them set in with concrete.


Next day after posts have set, George installs the support rails


Then onto the gate frame

My husband then had to elicit my help to put on all the fence pickets.


Our wonderful neighbor Lonnie comes over to give us words of encouragement.
 He and his wife Norma are the best.


Called it a night


Next day it was time to do the other side.  Nope don't be confused, the boat is our neighbors, we were just storing it for him.  lol but I am sure possession its 9/10th of the law...


This is a handy dandy level George got today.  Pity we didn't have it when we were doing the other side.


Drilling the post holders into the concrete driveway.

Then it was on to the double gate frame


And the panels go on.  Just so there is no confusion.  I was out there helping with the panels and sweating my big toosh off.. there are just no pics to prove it..


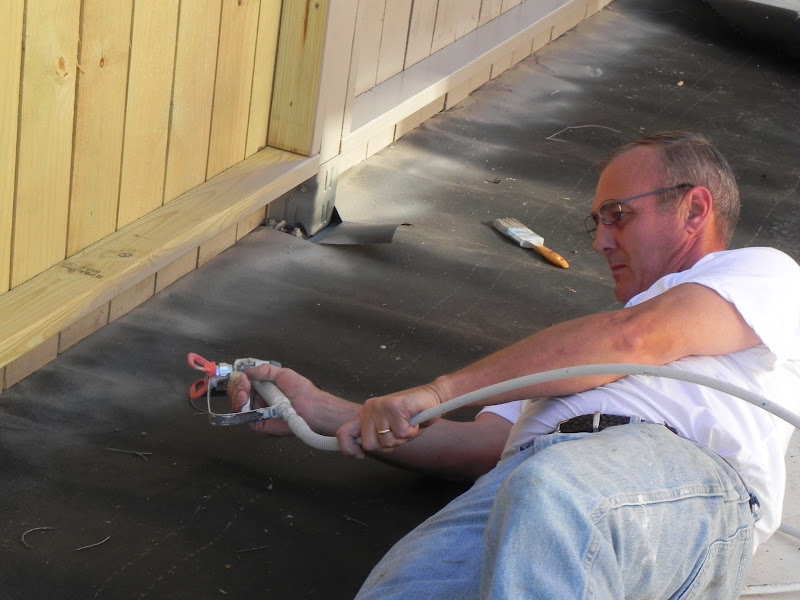
Three weeks later after the panels have dried out it is time to stain the fence.  It is definitely changed days.  Years ago you only got stain in three colors.  Natural, Red cedar and brown.  Now you can pretty much get any color you want.  We opted to go with a color as close to the color of our siding...

George prepping to get started with the spray gun...


I helped put the plastic up...lol

Let the spraying begin...


One side done , so I moved my car over so it did not get paint on it when he starts the other side of the house...not that I am not trusting but George has had a few mishaps where I am concerned during this project.


Plastic up and ready to go


and he is off...

We bought some Fence post solar lights..George installing them


Fence Done...


What I have Learned

Don't leave a space between the boards when installing if you live in a hot state
When the boards dry out completely, the space between them is bigger than you may want..lesson learned
The Duncan's never take the easy route but the reward is worth far more..

Until next time


As always feel free to share this Blog on your Facebook or with friends, post comments, become a Follower by hitting the follow button or ask a question...

Jackie D

An Afternoon Face Lift

Well we have been working outside on the pool and patio and we were ready to paint the inside of the pool today but it is pouring outside so I guess it is time for me to get back to finishing up all the small jobs inside the house that I have been putting off in order to get the house completed.

First I painted the last of the Hallway doors and the last door in the living room.  Then I had to paint the crown moulding and baseboards in the kitchen extension.  I got it all knocked out in no time and decided it was time to tackle the Kitchen Hutch that holds some of my polish Pottery.
It has been numerous colors over the years but it is looking the worst for wear and does not look good against the newly painted walls and remodelled Kitchen.


I have been using the Glidden no drip one coat paint for the last year on our home and I guess I am so use to it that when I opened the black paint it looked like water.  It was a pain in my rear end to use and I dripped it everywhere.  Not too worry, I overcame it and got to work.  I guess the bright side was that the paint was so thin it dried real quick between coats. 
 One afternoon and four coats of paint later, it's done..
Voila...


Old colored Hutch
New colored Hutch


Suffice to say I am happy with the results and it now compliments the new kitchen.
It's amazing what a few coats of paint can do for an old worn down hutch.
After some of the undertakings I have endured during this remodel I really could have painted this with one hand tied behind my back and blindfolded....lol...only kidding..


Happy, Happy..check another project off the list.


Note to self... go buy the hardware for the new cabinets to finish the kitchen completely.
Until next time
As always feel free to share this Blog on your Facebook or with friends, post comments, become a Follower by hitting the follow button or ask a question...
Jackie D


Saturday, April 28, 2012

The Building of a New Shed


It's been months since I blogged but we are still working hard getting the house finished.  We have celebrated Thanksgiving, Christmas, New Years, Valentines, Birthdays and our Daughter coming home from Germany from the last update of our furniture getting delivered way back at the end of October. 
Hopefully this post will get me back into the swing of things and I can backtrack and let you see what has happened with our home over the last six  months.

Anyway since starting the remodel and having our household goods delivered  it was apparent that we have way too much stuff  (crap) as my husband likes to call it.  
We decided the old 1960's tin shed would not cut it anymore and it was time for an upgrade. 
 Well after going back and forth with the city we finally got approval to build a new one.
We headed down to Leland's to see Dave Carlisle  http://www.texasparkhomes.com/

George picked out the style and I picked out the colors.  Since it will sit along side George's Man cave I wanted them to match.  George was going to get a 12 x 14  but as my friend Sabina always says " Go Big or Go Home"
so I convinced him to get the 12 x 20 with the city's approval of course.

Next order of business was to put up an awning on the back patio and empty our existing shed.

As you can see there is stuff everywhere on our back patio.  Anyone looking out there probably thinks we are the Clampits...lol


It was time to say goodbye to the old faithful.  George started getting the metal covering off.  Not an easy task by any means.


After getting as much as he could it was time to attach what was left of the building to his truck and pull it away from the fence line.


It took a few tries but he got it done and could now reach the other sides.


 It took most of the weekend but he got it done. 
 Our neighbor Jess helped him out the last day.

With the old shed gone George had to trim back the trees as the new shed going in was much larger.
Now I just want you to know that as per usual there are no pics of me working but I did spend a day clearing the site and hauling dirt to level out the area.

The Truck shows up bright and early Thursday morning with all the supplies.

 We were unable to have the shed pre built like the man cave and then delivered in one piece because we have put up a fence and the finished building would not fit through the gates. 
Still I thought it would come like a prefab.  The foundation/flooring, the 4 sides and the roof all in sections and then the contractor would put it together in jig time. 
Oops, NO  It was being built from scratch.
Let the building begin

George watching as they start to unload the truck.

They got the foundation and floor done and in place.


and had just completed a wall by the time I left to have lunch with my friend Darlene.


This is where they were by the time I got back late in the afternoon. 
Now the right side of the wall siding was not in line with the top area of the shed siding and  I noticed it as soon as I walked into the yard.  George was on the phone when I went to talk to him about it so I just decided to go and ask the contractors myself.
I pointed out the problem and asked if the were going to fix it.  They told me they already new and were going to change it.  A sigh of relief on my part because that would have drove me insane if I had not noticed it until they had left and the shed was completely built.


 After my hubby got off the phone he was back outside and came in a few minutes later and told me he had apologised to the guys because he didn't get a chance to tell me that they were planning on fixing the siding.  He knows me too well and knew exactly what I was saying when he seen me talking to them while he was on the phone. 
Oh well, they all got a laugh out of it.

The new front on and the roof trusses in place.  Let the painting begin.

The paint color is just slightly darker than the primed siding that they put on.

 Doors on..
This is actually a pic as they were finishing up at around 11Pm after getting the roof on.  George set up flood lights so they could see what they were doing.


This is our new shed looking all nice and pretty at the break of dawn

 George eager to start filling her up

 Checking out his doors..

George as Happy as a clam putting all his stuff away.  He just has to remember to leave half of the top deck for my Christmas Decorations and Trees..

WHAT I HAVE LEARNED

I am way behind on this blog
I love Leland Buildings
Most of all, that I can't wait to get the rest of the crap off my Patio....

Until next time
As always feel free to share this Blog on your Facebook or with friends, post comments, become a Follower by hitting the follow button or ask a question...

Jackie D